用GrapesJS搭建低代码平台(一)
GrapesJS是一个多用途的Web构建器框架,可以轻松创建支持拖放的"things"构建器。"things"是指任何具有类似 HTML 结构的事物,它所包含的内容远不止网页,基本上在任何地方都使用类似 HTML 的结构:时事通讯(例如 MJML)、本机移动应用程序(例如 React Native)、本机桌面应用程序(例如 Vuido)、PDF(例如 React PDF)等。
GrapesJS 主要用于内容管理系统内部,以加速动态模板的创建,并取代常见的所见即所得(WYSIWYG)编辑器,这些编辑器有利于内容编辑,但不适合创建 HTML 结构。GrapesJS没有创建应用程序,不过有一个demo,GrapesJS创建了一个可扩展的框架,任何人都可以用于任何目的。
下载GrapesJS
- CDNs
- npm
- npm i grapesjs
- git
- git clone https://github.com/GrapesJS/grapesjs.git
构建简单的block组件
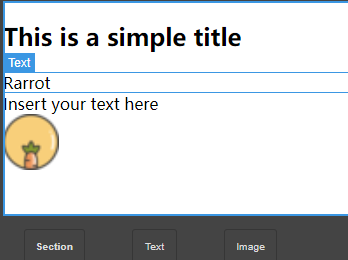
可以参考GrapesJs的官方文档,跟着敲下来可以实现基础的Section,Text,Image三个组件、样式管理器、层数管理器,特征管理器,不同设备尺寸切换以及在localstorage中暂存模版数据。
初始化canvas
定义编辑器的界面,下载好GrapesJS后,可以创建一个index.html,代码如下:
<!DOCTYPE html>
<html lang="en">
  <head>
    <meta charset="utf-8" />
    <title>GrapesJS</title>
    <link rel="stylesheet" href="dist/css/grapes.min.css" />
    <script src="grapes.min.js"></script>
    <!--引入grapesjs-preset-webpage-->
    <link rel="stylesheets" href="https://grapesjs.com/stylesheets/grapesjs-preset-webpage.min.css"/>
    <script src="https://grapesjs.com/js/grapesjs-preset-webpage.min.js?v0.1.11"></script>
    <style>
      body,
      html {
        height: 100%;
        margin: 0;
      }
      #gjs {
        border: 3px solid #444;
      }

      /* 重置一些默认样式 */
      .gjs-cv-canvas {
        top: 0;
        width: 100%;
        height: 100%;
      }
    </style>
  </head>

  <body>
    <div id="gjs" style="height: 0px; overflow: hidden">
      <h1>Hello World Component!</h1>
    </div>

    <script type="module">
      const editor = grapesjs.init({
        // 指示在哪里启动编辑器,还可以传递 HTMLElement
        container: '#gjs',
        // 直接从元素获取画布的内容
        // 作为替代方案,可以使用:`components: '<h1>Hello World Component!</h1>'`
        fromElement: true,
        // 编辑器的高度
        height: '100%',
        width: 'auto',
        // 禁用存储管理器
        storageManager: false,
        // 避免任何默认面板
        panels: { defaults: [] },
      });
    </script>
  </body>
</html>添加Blocks
GrapesJS 中的块只是一段可重用的 HTML,你可以将其放入canvas中。block可以是图像、按钮或包含视频、表单和 iframe 的整个部分。
Block是一个或多个Component组成的"代码片段",用户拖拽到页面的就是Block。
<div id="gjs">
  ...
</div>
<!-- 用来放置区块管理器 -->
<div id="blocks"></div>const editor = grapesjs.init({
// ...
blockManager: {
appendTo: "#blocks",
blocks: [
{
id: "section", // id 为必填项
label: "<b>Section</b>", // 可以在标签内使用 HTML/SVG
attributes: { class: "gjs-block-section" },
content: `<section>
<h1>This is a simple title</h1>
<div>This is just a Lorem text: Lorem ipsum dolor sit amet</div>
</section>`,
},
{
id: "text",
label: "Text",
content: '<div data-gjs-type="text">Insert your text here</div>',
},
{
id: "image",
label: "Image",
// 放置组件后选择该组件
select: true,
// 可以将组件作为 JSON 而不是简单的 HTML 字符串传递
// 使用GrapesJS给到的组件“image”
content: { type: "image" },
// 在放置的组件和“image”上触发“active”事件
// 通过打开 AssetManager 做出反应
activate: true,
},
],
},
});...
.gjs-block {
width: auto;
height: auto;
min-height: auto;
}
添加Components
GrapesJS 附带了一些内置组件,一旦在画布中渲染,它们就可以启用不同的功能。例如,通过双击图像组件,你将看到默认的资源管理器,你可以自定义或集成你自己的资源管理器。通过双击文本组件,可以通过内置的富文本编辑器对其进行编辑,该编辑器也是可自定义和可替换的。
当用户将Block拖动到Canvas里之后,GrapesJS会经由解析器将它们转换成Component,这时候用户编辑组件的样式、内容、属性等,就变成和Component交互了。
以下为示例代码,注释用文件资源管理器作一个讲解:
// 将Blcok创建为组件
editor.BlockManager.add("my-block-id", {
  // 文件名
  label: "my-block",
  // 这里设置"my-block-id"归属于哪个文件夹,
  // value值为文件夹名,BlockManager为根目录,里边有很多文件夹
  category: "Base",
  content: {
    tagName: "div",
    draggable: true,
    // 定义元素内部的一些属性,例如class类
    attributes: { "some-attribute": "some-value" },
    // 嵌套组件
    components: [
      {
        tagName: "span",
        // “content”作为静态字符串
        content: "<b>Some static content</b>",
      },
      {
        tagName: "div",
        // “components”字符串将被解析并在组件中进行转换
        components: "<span>HTML at some point</span>",
      },
    ],
  },
});

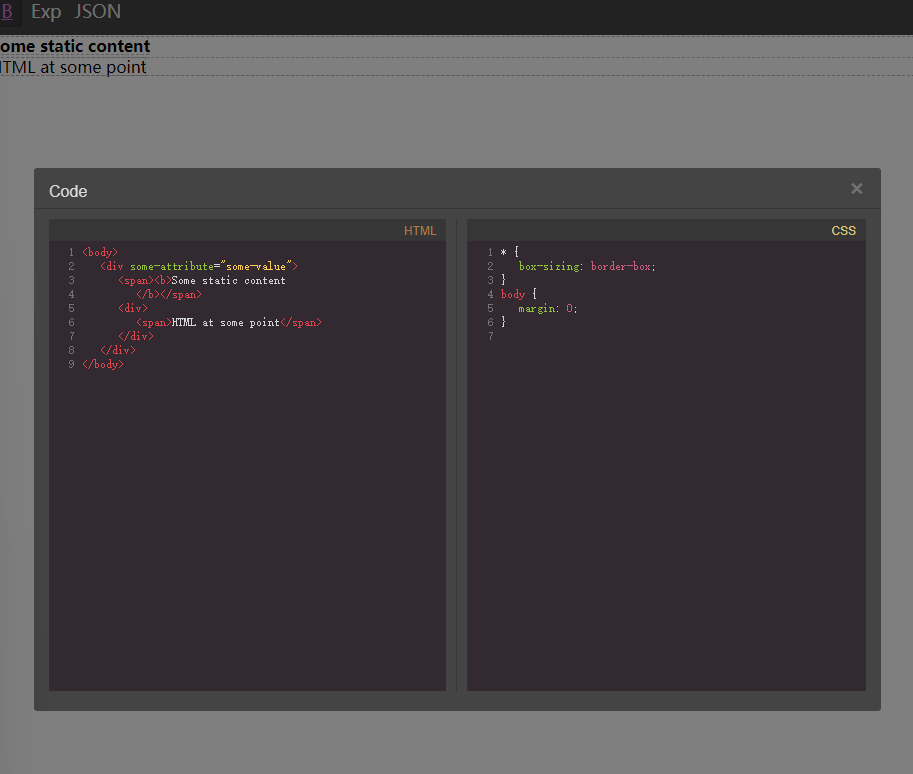
// 此Block生成的HTML为:
<body>
  <div some-attribute="some-value">
    <span>
      <b>Some static content</b>
    </span>
    <div>
      <span>HTML at some point</span>
    </div>
  </div>
</body>自定义面板
在上面的时候我们用panels: { defaults: [] }避免了任何默认面板,可以用panels添加一些按钮,例如全屏,预览,代码导出等,现在我们用Panels API添加页面代码和json查看:
<div class="panel__top">
  <div class="panel__basic-actions"></div>
</div>
<div id="gjs">
  ...
</div>
<div id="blocks"></div>.panel__top {
padding: 0;
width: 100%;
display: flex;
position: initial;
justify-content: center;
justify-content: space-between;
}
.panel__basic-actions {
position: initial;
}editor.Panels.addPanel({
id: 'panel-top',
el: '.panel__top',
});
editor.Panels.addPanel({
id: 'basic-actions',
el: '.panel__basic-actions',
buttons: [
{
id: 'visibility',
active: true, // 默认处于活动状态
className: 'btn-toggle-borders',
label: '<u>B</u>',
command: 'sw-visibility', // Built-in 命令
}, {
id: 'export',
className: 'btn-open-export',
label: 'Exp',
command: 'export-template',
context: 'export-template', // 用于对同一面板中的按钮上下文进行分组
}, {
id: 'show-json',
className: 'btn-show-json',
label: 'JSON',
context: 'show-json',
command(editor) {
editor.Modal.setTitle('Components JSON')
.setContent(`<textarea style="width:100%; height: 250px;">
${JSON.stringify(editor.getComponents())}
</textarea>`)
.open();
},
}
],
});
图层管理器
图层管理器可以展示节点的树状结构,能够更轻松地管理每个元素,示例代码:
<div class="panel__top">
    <div class="panel__basic-actions"></div>
</div>
<div class="editor-row">
  <div class="editor-canvas">
    <div id="gjs">...</div>
  </div>
  <div class="panel__right">
    <div class="layers-container"></div>
  </div>
</div>
<div id="blocks"></div>.editor-row {
display: flex;
justify-content: flex-start;
align-items: stretch;
flex-wrap: nowrap;
height: 300px;
}
.editor-canvas {
flex-grow: 1;
}
.panel__right {
flex-basis: 230px;
position: relative;
overflow-y: auto;
}const editor = grapesjs.init({
// ...
layerManager: {
appendTo: '.layers-container'
},
// 定义一个默认面板作为侧边栏来包含图层
panels: {
defaults: [{
id: 'layers',
el: '.panel__right',
// 调整面板大小
resizable: {
maxDim: 350,
minDim: 200,
tc: 0, // Top handler
cl: 1, // Left handler
cr: 0, // Right handler
bc: 0, // Bottom handler
// 作为一个 Flex child,我们需要更改“flex-basis”属性
// 而不是“宽度”(默认)
keyWidth: 'flex-basis',
},
}]
}
});样式管理器,特征管理器,不同设备尺寸切换,在localstorage中暂存模版数据
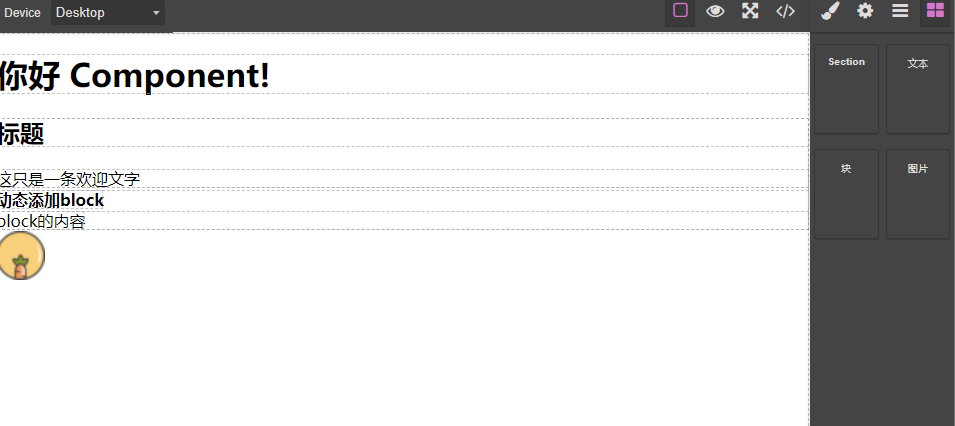
相信到这里你已经大致了解低代码构建器是怎么配置的了,去官方文档还有样式管理器,特征管理器,不同设备尺寸切换的代码可以直接复制粘贴使用。
当然你可以把panels: { defaults: [] }删除,这样你就拥有一个比较完善的编辑器了,editor配置可以如下:
<style>
  body,
  html {
    height: 100%;
    margin: 0;
  }
</style>
<div id="gjs" style="height: 0px; overflow: hidden">
</div>var editor = grapesjs.init({
showOffsets: 1,
noticeOnUnload: 0,
container: '#gjs',
height: '100%',
fromElement: true,
storageManager: {
autoload: 0
},
styleManager: {
sectors: [{
name: 'General',
open: false,
buildProps: ['float', 'display', 'position', 'top', 'right', 'left', 'bottom']
}, {
name: 'Flex',
open: false,
buildProps: ['flex-direction', 'flex-wrap', 'justify-content', 'align-items', 'align-content',
'order', 'flex-basis', 'flex-grow', 'flex-shrink', 'align-self'
]
}, {
name: 'Dimension',
open: false,
buildProps: ['width', 'height', 'max-width', 'min-height', 'margin', 'padding'],
}, {
name: 'Typography',
open: false,
buildProps: ['font-family', 'font-size', 'font-weight', 'letter-spacing', 'color', 'line-height',
'text-shadow'
],
}, {
name: 'Decorations',
open: false,
buildProps: ['border-radius-c', 'background-color', 'border-radius', 'border', 'box-shadow',
'background'
],
}, {
name: 'Extra',
open: false,
buildProps: ['transition', 'perspective', 'transform'],
}],
},
});
